
Brand logos and images for informational purposes only - © 2026 Penny Lane Domestic Appliances


Penny Lane Domestic Appliances
How to connect a washing machine
Instructions for how to connect your washing machine in four steps
Step 1: Remove the 4 transit bolts
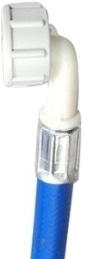
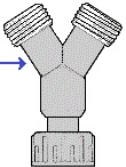
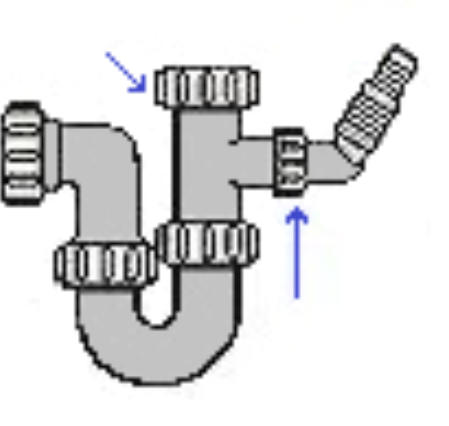
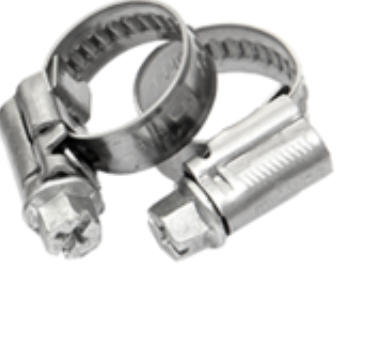
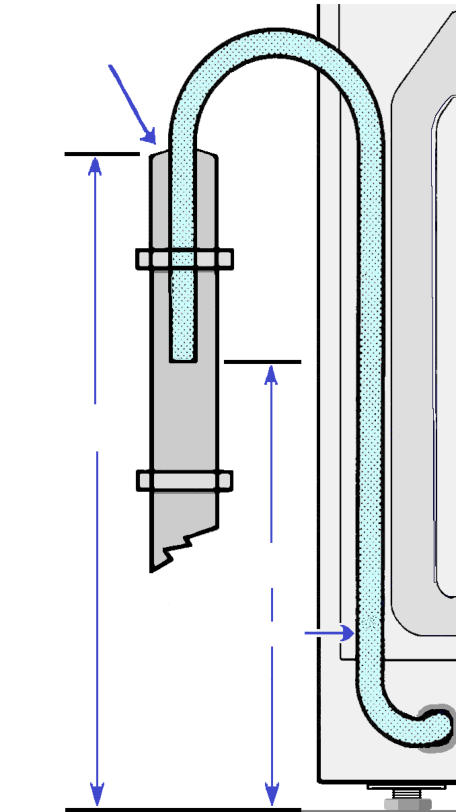
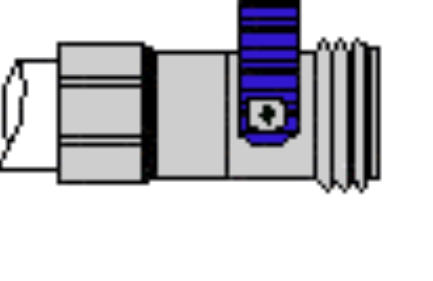
If you are connecting a new machine, one of the first things you must do after removing all the packaging is to remove the 4 transit bolts from the back of the machine. The transit bolts are fitted to protect the washing machine from being damaged whilst it's being delivered. Step 2: Connecting the water Cold fill machines First screw the end of the water intake hose, the one with a right-angled bend to the inlet valve on the back of the machine. Then screw the other end of the hose to the cold water supply isolation valve with the blue tap and turn on the water. All washing machines sold nowadays are cold water fill only Originally, washing machines were connected to the cold and the hot water supply; because the hot water was used to supplement the heating process. Blank the hot water supply valve It's always advisable to blank off the end of the surplus hot water supply isolation valve with a Blanking cap and Washer to prevent potential leakage. Hot and cold fill machines Always make sure the hot & cold water intake hoses are the right way round when you screw then onto the inlet valves at the back of the machine. (They're different from machine to machine) No hot water supply? Don't worry you just need to connect the hot and the cold intake hoses to the cold water supply valve using a ' Y ' Piece hose connector Your washing machine will heat up the water to the required temperature using the internal water heater. The detergent will remain in the soap drawer It’s also worth taking into consideration if you don't connect the hot water intake hose, your detergent will remain in the soap drawer instead of doing the wash. Because, it's usually the hot water that rinses the detergent out of the soap drawer and into the wash. Step 3: Draining the waste water Draining the waste water with a standpipe Make sure the drain hose raises from floor level to at least 2/3rd's the height of the machine, before dropping down into the standpipe. Because, the water inside the machine could run straight out as it fills. Also, don't push the drain hose any more than 1/3rd the way down the standpipe - otherwise siphoning can result. Using a waste hose hook will secure the hose at the correct depth Connecting to a sink trap to drain the waste water Before connecting the waste hose to a new sink trap washing machine nozzle, remove the blue blanking plug from inside the nozzle - you’ll have to unscrew the nozzle from the trap to enable the removal of the blanking plug. If your sinks trap is fitted with a straight nozzle and there's no blanking plug inside? You will have to cut-off the end of the blanking part of the nozzle. After you’ve completed either of the previous two stages that will enable the waste water to drain through the nozzle into the sink trap; then firmly push the rubber end of the machines waste hose as far down the trap nozzle as possible, and secure the end of the hose tightly with a Jubilee clip to prevent leakage. Raise the height of the hose at some point After connecting the drain hose to a sink trap, raise the height of the hose at some point so that it is higher than the outlet pipe from the sink, because the waste water from the sink can drain into the washing machine. Waste hose too short? If the waste hose of your washing machine is too short and doesn't reach your standpipe, or sink trap. You will have to extend the waste hose with a second waste hose, using a Universal waste hose connector. Firmly push the rubber ends of the waste hoses as far down the waste hose connector as possible and secure each end tightly with a Jubilee clip to prevent leakages. Step 4: Levelling the machine If your machine isn't Level it will vibrate; Vibration will cause the machine to be very noisy when spinning, and sometimes excessive vibration can make the machine move around. Before moving your machine into its final resting location, you will need to screw all the adjustable feet all the way into the chassis of the machine. Once you've moved the machine into its final resting location, rock the machine back and forth to check for movement. If there is any movement you will need to adjust one of the front feet to level the machine, then tighten the locking-nut to retain the correct height of the foot. Now test your machine After you've completed the previous four steps of connecting your machine and you've finally plugged the machine into the mains. We would recommend you do a quick test of the machine before you do the first full wash. The simplest way to test your machine is to run the machine empty on a Rinse and Spin program Check the machine is filling with cold water * Check that all the waste water has completely draining out the drum If you've connected the waste hose to the sink trap, check for leakage If you've extended the waste hose, check the connections for leakages Check the machine isn't vibrating when it's spinning With a Rinse and Spin program your machine should only be filling with cold water * If your machine is filling with hot water when rinsing? You've accidentally connected the cold water intake hose to the hot water supply valve, instead of the cold water supply valve. If you continue using a cold fill machine with a hot water supply, you’ll permanently damage the machines inlet valves. Has your washing machines cold water supply been plumbed in wrong? A recent phenomenon were starting to come across in our customers homes; is that Kitchen-Fitters / Plumbers are carelessly connecting the cold only water supply for a washing machine to the hot water heated by a Combi Boiler. This means instead of washing all your delicate laundry at a safe cool 30°C wash, you’ll be washing and rinsing all your laundry with water temperatures exceeding 60°C. Also, if you continue using a cold fill machine with a hot water supply you’ll permanently damage the machines inlet valves.We can connect your washing machine
If after reading the above advice and you still feel you are unable to connect your machine yourself ? We’ll connect your machine for just: £40.00 Please note: We only connect washing machines to your existing plumbing; we don't install any new plumbing or repair your existing plumbing.


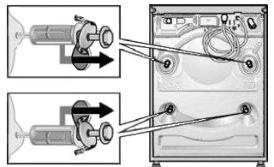
Removing transit bolts


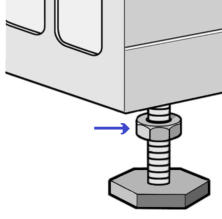
Locking-nut
Adjustable foot



Washing machine nozzle
Blanked off
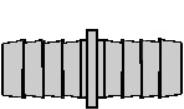
Universal waste hose connector
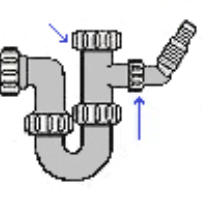
Sink trap
Blue banking
plug inside

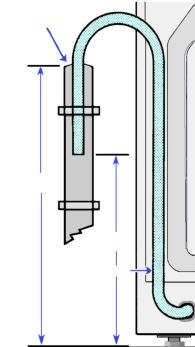
Standpipe
2/3rd’s
1/3rd
Waste hose

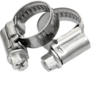
Jubilee Clips

We accept:


Cold only water supply


07976608381
01512812526


Brand logos and images for informational purposes only
© 2026 Penny Lane Domestic Appliances
How to connect a
washing machine
Instructions for how to
connect your washing
machine in four steps
Step 1:
Remove the 4 transit bolts
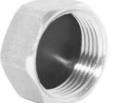
If you are connecting a new machine, one of the first things you must do after removing all the packaging is to remove the 4 transit bolts from the back of the machine. The transit bolts are fitted to protect the washing machine from being damaged whilst it's being delivered. Step 2: Connecting the water Cold fill machines First screw the end of the water intake hose, the one with a right-angled bend to the inlet valve on the back of the machine. Then screw the other end of the hose to the cold water supply valve with the blue tap and turn on the water. All washing machines sold nowadays are cold water fill only Originally, washing machines were connected to the cold and the hot water supply; because the hot water was used to supplement the heating process. Blank the hot water supply valve It's always advisable to blank off the end of the surplus hot water supply valve with a Blanking cap and Washer to prevent potential leakage. Hot and cold fill machines Always make sure the hot & cold water intake hoses are the right way round when you screw then onto the inlet valves at the back of the machine. (They're different from machine to machine) No hot water supply? Don't worry you just need to connect the hot and the cold intake hoses to the cold water supply valve using a ' Y ' Piece hose connector. ' Y ' Piece hose connector Your washing machine will heat up the water to the required temperature using the internal water heater. The detergent will remain in the soap drawer It’s also worth taking into consideration if you don't connect the hot water intake hose, your detergent will remain in the soap drawer instead of doing the wash. Because, it's usually the hot water that rinses the detergent out of the soap drawer and into the wash. Step 3: Draining the waste water Draining the waste water with a standpipe Make sure the drain hose raises from floor level to at least 2/3rd's the height of the machine, before dropping down into the standpipe. Because, the water inside the machine could run straight out as it fills. Also, don't push the drain hose any more than 1/3rd the way down the standpipe - otherwise siphoning can result. Connecting to a sink trap to drain the waste water Before connecting the waste hose to a new sink trap washing machine nozzle, remove the blue blanking plug from inside the nozzle - you will have to unscrew the nozzle from the trap to enable the removal of the blanking plug. If your sinks trap is fitted with a straight nozzle and there's no blanking plug inside? You'll have to cut-off the end of the blanking part of the nozzle. After you’ve completed either of the previous two stages that will enable the waste water to drain through the nozzle into the sink trap; then firmly push the rubber end of the machines waste hose as far down the trap nozzle as possible, and secure the end of the hose tightly with a Jubilee clip to prevent leakage. Raise the height of the hose at some point After connecting the drain hose to a sink trap, raise the height of the hose at some point so that it is higher than the outlet pipe from the sink, because the waste water from the sink can drain into the washing machine. Waste hose too short? If the waste hose of your washing machine is too short and doesn't reach your standpipe, or sink trap. You will have to extend the waste hose with a second waste hose, using a Universal waste hose connector. Firmly push the rubber ends of the waste hoses as far down the waste hose connector as possible and secure each end tightly with a Jubilee clip to prevent leakages. Step 4: Levelling the machine If your machine isn't Level it will vibrate; Vibration will cause the machine to be very noisy when spinning, and sometimes excessive vibration can make the machine move around. Before moving your machine into its final resting location, you will need to screw all the adjustable feet all the way into the chassis of the machine. Once you've moved the machine into its final resting location, rock the machine back and forth to check for movement. If there is any movement you will need to adjust one of the front feet to level the machine, then tighten the locking-nut to retain the correct height of the foot. Now test your machine After you've completed the previous four steps of connecting your machine and you've finally plugged the machine into the mains. We would recommend you do a quick test of the machine before you do the first full wash. The simplest way to test your machine is to run the machine empty on a Rinse and Spin program Check the machine is filling with cold water * Check that all the waste water has completely draining out the drum If you've connected the waste hose to the sink trap, check for leakage If you've extended the waste hose, check the connections for leakages Check the machine isn't vibrating when it's spinning With a Rinse and Spin program your machine should only be filling with cold water * If your machine is filling with hot water when rinsing? You've accidentally connected the cold water intake hose to the hot water supply valve, instead of the cold water supply valve. If you continue using cold fill machine with a hot water supply, you’ll permanently damage the machines water intake valves. Has your washing machines cold water supply been plumbed in wrong A recent phenomenon were starting to come across in our customers homes; is that Kitchen-Fitters / Plumbers are carelessly connecting the cold only water supply for a washing machine to the hot water heated by a Combi Boiler. This means instead of washing your delicate laundry at a safe cool 30°C wash, you’ll be washing and rinsing all your laundry with water temperatures exceeding 60°C. Also, if you continue using cold fill machine with a hot water supply you’ll permanently damage the machines water intake valves.We can connect your
washing machine
If after reading the above advice and you still feel you are unable to connect your machine yourself ? We’ll connect your machine for just: £40.00 Please note: We only connect washing machines to your existing plumbing; we don't install any new plumbing or repair your existing plumbing.

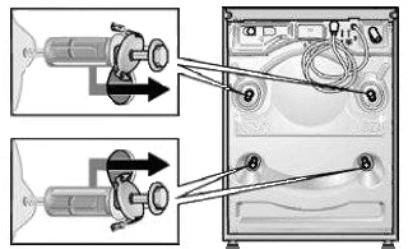
Removing transit bolts


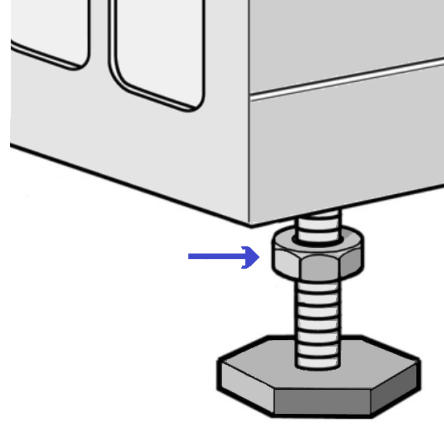
Locking-nut
Adjustable foot
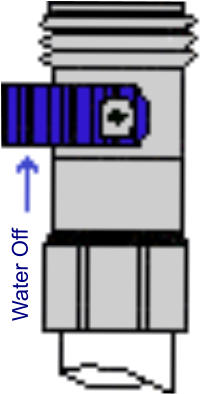

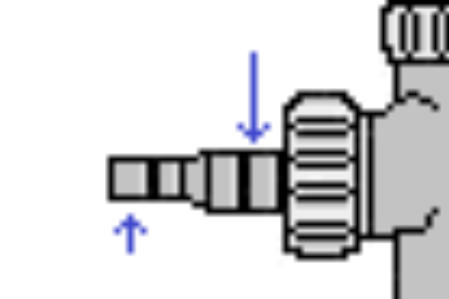
Washing machine nozzle
Blanked off
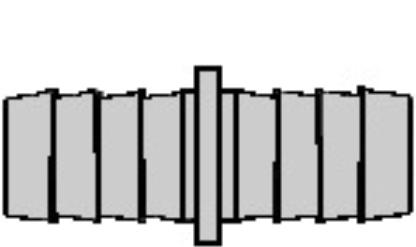
Universal waste hose connector

Sink trap
Blue banking
plug inside
Jubilee Clips

We accept
Penny Lane
Domestic Appliances


Standpipe
2/3rd’s
1/3rd
Waste hose


Cold only water supply

07976608381
01512812526


